
To quickly fix a crooked vacuum brush roll at home, unplug your vacuum first. Then, remove the cover to access the brush housing, and carefully take out the roller. Check for damage or tangled debris, and straighten the roller if it’s crooked using your hands or alignment tools. Reinstall it securely and test the vacuum on a small area. For step-by-step guidance and tips to keep it aligned, keep exploring the process.
Key Takeaways
- Unplug the vacuum and access the brush roll housing by removing screws or clips carefully.
- Inspect the brush roll for damage, debris, or misalignment indicators like wobbling or uneven rotation.
- Remove the brush roll, clean it thoroughly, and check for bent or broken parts.
- Use a straight edge or level to realign the brush roll, ensuring it spins smoothly and stays centered.
- Reinstall the brush roll securely, test the vacuum, and perform routine maintenance to prevent future misalignment.

SCUBAPRO Hydros Pro Men’s Back Inflated Scuba BCD with Balanced Power Inflator for Recreational and Travel Scuba Diving, Medium, Black
Durable Modular Design: Injection molded Monprene gel harness is constructed without velcro or zippers and resists UV, chemicals,...
As an affiliate, we earn on qualifying purchases.
Unplug Your Vacuum and Prepare for Inspection

Before you begin inspecting the vacuum brush roll, make sure to unplug the machine to prevent any accidents. Prioritizing vacuum safety is essential before working on any appliance. Once unplugged, take a moment to choose the right tools for the job—typically a screwdriver and possibly needle-nose pliers. Using the correct tool selection guarantees you won’t damage screws or parts during disassembly. Never attempt to work on your vacuum while it’s plugged in, as this can lead to electrical shocks or injury. Confirm that the vacuum is completely powered off and unplugged before proceeding. This simple step keeps you safe and sets the foundation for a smooth inspection process. Remember, safety always comes first when handling household appliances. Additionally, understanding the electrical safety precautions can help prevent accidents during maintenance.

SCUBAPRO Hydros Pro Women’s Back Inflated Scuba Diving BCD with Air2 Inflator Regulator for Recreational and Travel Scuba Diving, Medium, White
An injection-molded Monprene gel harness, adjustable shoulder straps, and multi-attachment points make the Hydros Pro a leader in...
As an affiliate, we earn on qualifying purchases.
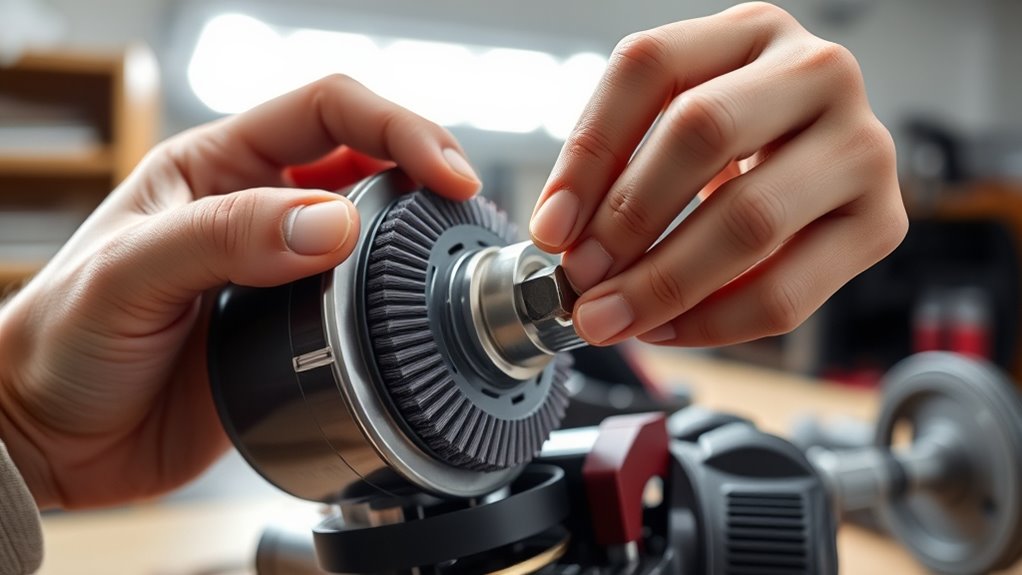
Access the Brush Roll Housing

To access the brush roll housing, start by locating the screws or clips that secure the cover in place. Use a screwdriver to carefully remove them, keeping track of the hardware. Once removed, gently lift the cover to expose the brush roll. This is your chance to perform housing cleaning, removing dust and debris that could hinder movement. During this process, if the brush roll seems stiff, consider applying some brush roll lubrication to keep it spinning smoothly. Use the table below to help identify common parts and tips:
| Part | Tip |
|---|---|
| Screws/Clips | Keep them organized for reassembly. |
| Brush Roll | Check for obstructions or debris. |
| Housing | Clean thoroughly before realignment. |
| Bearings | Lubricate if they feel stiff. |
| Cover | Handle carefully to avoid damage. |
Additionally, understanding the industry transformations related to AI automation can help you anticipate future features and updates for your vacuum model.

Action Camera 5K 30FPS Waterproof Camera Underwater 131FT with EIS WiFi App Remote Control 64GB Card 170° Wide Angle Sports Helmet Bike Video Black
Stunning 5K30FPS Video & 30MP Image – Ultra HD Action Camera 4K Experience: Capture crystal-clear visuals with 5K30FPS...
As an affiliate, we earn on qualifying purchases.
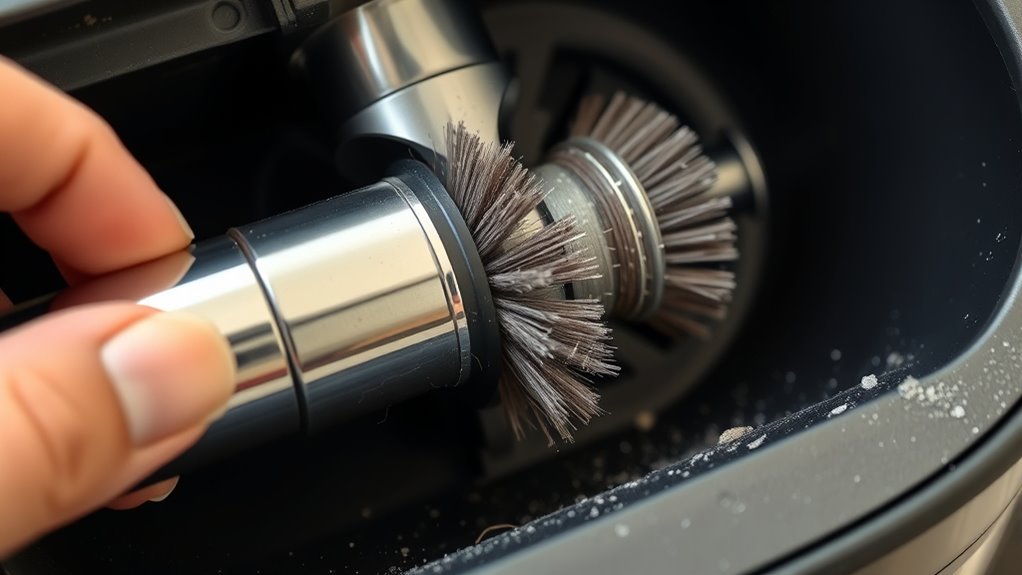
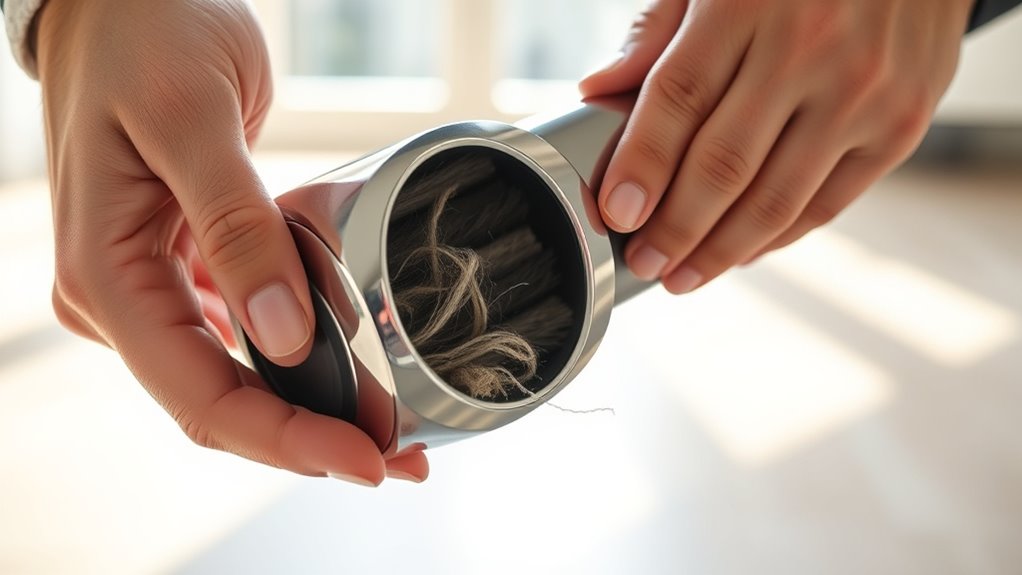
Examine the Brush Roll for Damage or Obstructions
Take a close look at the brush roll to see if anything is blocking it, like hair or debris. Check for any broken or worn parts that might affect its movement. Also, look for visible damage that could be causing the misalignment or malfunction.
Inspect for Obstructions or Debris
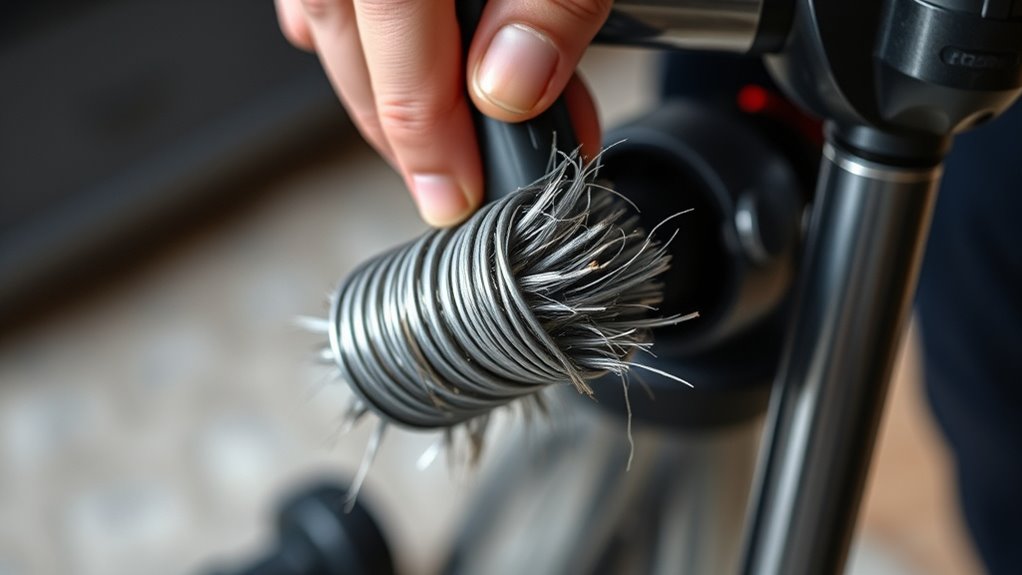
Have you checked the brush roll for obstructions or debris that could be causing it to misalign? Often, brush debris or tangled threads can hinder proper rotation, leading to uneven cleaning. Remove the brush roll and inspect it carefully. Look for tangled threads, hair, or debris wrapped around the shaft or bristles. These obstructions can cause the brush to wobble or sit crooked. Clearing away these blockages helps ensure smooth movement and proper alignment. Use scissors or tweezers to remove tangled threads or debris stuck in the brush. Also, check for any buildup that might be preventing the brush from spinning freely. Keeping the brush roll clean and free of obstructions is a simple step to restore peak performance and prevent misalignment issues. Additionally, understanding the contrast ratio of your projector can help you optimize your viewing environment for the best possible image quality.
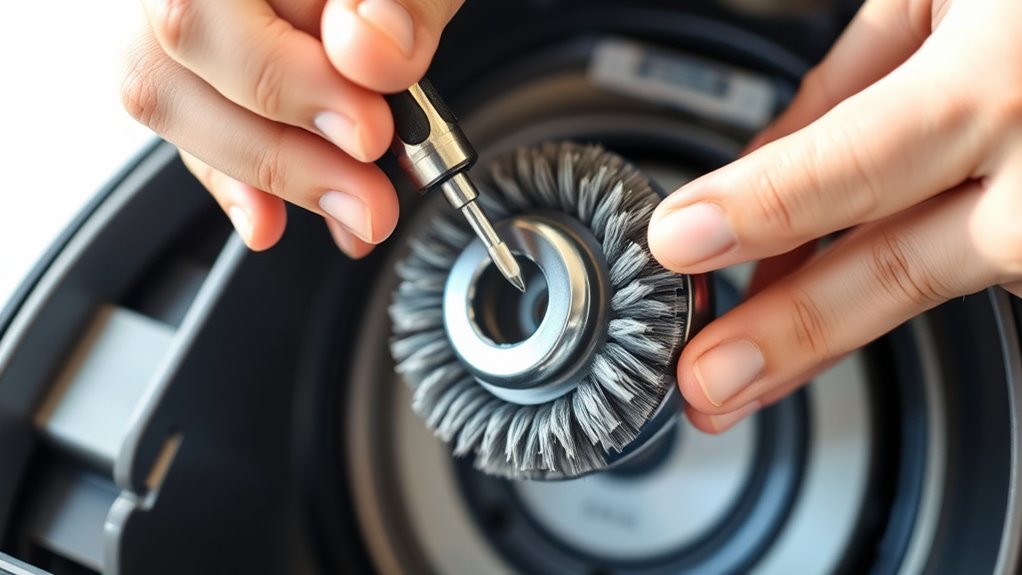
Check for Broken or Worn Parts
Even if your brush roll appears clear of debris, it’s important to check for broken or worn parts that could cause misalignment. Look closely at the brush roll for signs of brush wear or damage, such as frayed bristles or uneven surfaces. Broken parts, like loose or missing end caps or damaged bearings, can also lead to a crooked roll. Worn brush roll wear weakens the structure, making it prone to misalignment. If you notice any cracks, chips, or parts that don’t spin freely, replace or repair them before proceeding. Ensuring all components are intact and in good condition helps the brush roll rotate smoothly and stay aligned. Regularly inspecting grocery store hours can help you plan maintenance or shopping trips to acquire replacement parts, preventing further damage and maintaining your vacuum’s performance. Addressing broken parts early prevents further damage and maintains your vacuum’s performance.
Assess for Visible Damage
Before attempting to realign your vacuum’s brush roll, it’s crucial to examine it closely for visible damage or obstructions. Carefully inspect the brush roll for cracks, dents, or broken bristles, as these can affect its performance. Obstructions like hair, string, or debris wrapped around the brush can cause it to spin unevenly or get stuck, impacting vacuum maintenance. Familiarize yourself with the brush roll design to identify areas prone to damage or buildup. If you notice any visible damage or significant obstructions, address these issues before proceeding. Removing debris and repairing or replacing damaged components ensures the brush roll functions smoothly and maintains proper vacuum operation. A thorough visual check helps prevent further issues and prolongs the life of your vacuum. Additionally, understanding the filter replacement indicators can help ensure your vacuum continues to operate efficiently after realignment.

ACR RESQLINK AIS Personal Locator Beacon - SOS, GPS, Return Link Service, Mobile App and Accessory Clips (Model PLB-450) - Alert Local AIS & Global Satellite Emergency Signaling for Search & Rescue
AIS (Automatic Identification System) sends a distress alert on VHF frequencies, received by vessels with AIS receivers or...
As an affiliate, we earn on qualifying purchases.
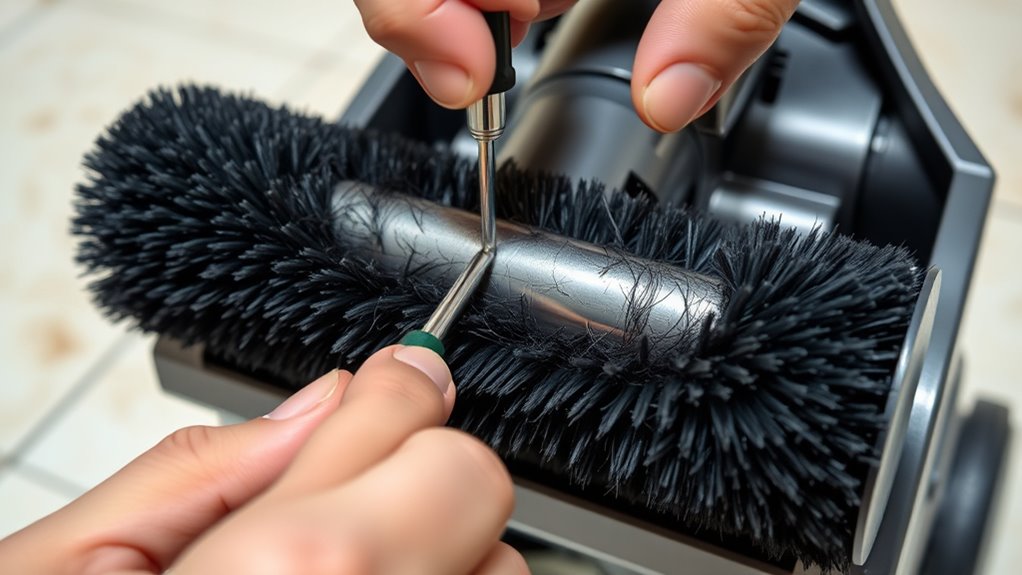
Remove the Brush Roll Carefully
To prevent damage to the brush roll or your vacuum, it’s essential to remove it carefully. Start by unplugging your vacuum and locating the brush roll cover. Gently release any latches or screws holding it in place. When removing the brush, perform a thorough component inspection to check for debris or damage. Handle the brush with care to avoid bending or breaking it. Proper removal and inspection can help maintain optimal indoor air quality and ensure your vacuum functions effectively.
Identify the Crooked or Misaligned Section
Start by closely inspecting the brush roll for any uneven spots or bent sections. Look for signs like uneven spinning, unusual noises, or visible wobbling when the roll is in motion. These clues will help you pinpoint the exact area that’s misaligned or crooked. Additionally, combining scents such as citrus oils with mint can create a refreshing ambiance that energizes your cleaning space.
Visual Inspection Tips
A quick visual check can often reveal if your vacuum’s brush roll is crooked or misaligned. Start by inspecting the brush from different angles, looking for uneven rotation or wobbling. Check for signs of debris buildup around the brush ends or underneath the roll, which can affect brush alignment. Clear away any hair, fibers, or dirt that may be tangled around the bristles or axle. Look for uneven wear or bent parts that could indicate misalignment. Pay attention to the way the brush spins — it should rotate smoothly without wobbling. Removing debris and ensuring the brush is straight helps maintain proper brush alignment, improving cleaning performance and preventing further damage. A thorough visual inspection is a simple step toward fixing your vacuum’s issues. Regular maintenance and understanding tuning techniques can also help optimize your vacuum’s performance over time.
Signs of Misalignment
How can you tell if your vacuum’s brush roll is misaligned? Look for uneven contact with the floor, which causes inconsistent cleaning. If the vacuum brush seems to wobble or tilt to one side, that’s a clear sign. You might also notice strange noises or vibrations during operation, indicating misalignment causes. Additionally, check for hair or debris caught unevenly on the brush, showing it isn’t spinning properly. Regularly inspecting the brush alignment helps maintain optimal performance and prevents damage.
Signs of misalignment include:
- Uneven wear or buildup on one side of the brush
- Reduced suction or cleaning performance
- Visible crookedness or wobbling of the vacuum brush
Addressing these signs promptly helps prevent further damage and restores ideal cleaning power.
Straighten the Brush Roll and Check for Proper Alignment
Before attempting to realign the vacuum brush roll, make sure the vacuum is unplugged to prevent any accidents. Start by examining the brush roll for signs of misalignment or uneven wear. Use your alignment tools, such as a straight edge or a level, to check if the brush roll runs parallel to the vacuum base. Gently straighten the brush roll if it appears crooked, ensuring it’s centered and properly aligned within the housing. Proper brush roll maintenance involves keeping it aligned to prevent future issues and maintain efficient cleaning. Once aligned, manually spin the brush roll to verify it turns smoothly without wobbling. Confirm that the roller is securely fastened and moves freely, ensuring ideal performance and reducing strain on your vacuum motor. Regularly inspecting and maintaining your vacuum components can help improve longevity and ensure optimal operation.
Reinstall and Secure the Brush Roll
Once you’ve confirmed the brush roll is properly aligned and spins smoothly, it’s time to reinstall it into the vacuum. Properly securing the brush roll is essential for effective vacuum maintenance and successful brush roll replacement. Carefully slide the roll back into its housing, ensuring it fits snugly in the designated slot. Use the following steps to secure it correctly:
- Reattach any clips or retaining bars that hold the brush roll in place
- Tighten screws or clips firmly without over-tightening
- Double-check that the brush roll spins freely and is aligned correctly
Taking these steps guarantees the brush roll stays secure during operation. Proper reinstallation prevents future issues and ensures your vacuum functions as intended, making your maintenance routine smoother and more effective.
Test the Vacuum to Ensure Proper Functioning
Are you ready to guarantee your vacuum is working properly after reinstallation? Start by turning it on and testing it on a small section of carpet or rug. Listen for unusual noises and check if the brush roll spins freely without obstruction. Proper brush roll alignment is essential for effective vacuum troubleshooting; if it’s crooked or jammed, suction and cleaning performance suffer. Observe if the vacuum picks up debris efficiently and if the brush roll maintains consistent contact with the surface. If you notice any issues like strange sounds, uneven cleaning, or the brush not spinning, double-check the alignment and re-secure the brush roll if needed. Performing this quick test ensures your vacuum functions at its best and that your recent adjustments were successful.
Perform Regular Maintenance to Prevent Future Issues

Regular maintenance is key to keeping your vacuum performing its best over time. To prevent future issues, make routine checks a habit. Regularly clean the brush roll to remove tangled hair and debris, which can hinder performance. Lubricate the brush roll bearings as needed to ensure smooth rotation. When wear and tear become evident, explore replacement options to restore efficiency. Consider these steps:
- Check and clean the brush roll regularly
- Lubricate bearings to prevent squeaking and wear
- Replace worn or damaged brush rolls promptly
Staying on top of maintenance helps avoid crooked or jammed brush rolls. This proactive approach keeps your vacuum running smoothly and extends its lifespan, saving you time and money in the long run.
Frequently Asked Questions
How Often Should I Check My Vacuum’s Brush Roll for Alignment?
You should check your vacuum’s brush roll for alignment every few months as part of routine maintenance. Regular inspections help you catch issues early and prevent troubleshooting steps later. Look for signs of crookedness or debris buildup. If you notice the brush roll isn’t spinning properly or looks misaligned, realign it promptly. This simple maintenance tip keeps your vacuum running efficiently and extends its lifespan.
Can I Fix a Crooked Brush Roll Without Professional Tools?
You can definitely fix a crooked vacuum brush roll with DIY maintenance, even without professional tools. Start by unplugging your vacuum, then carefully remove the brush roll. Use common household items like a flat-head screwdriver or a pair of pliers as tool alternatives to realign the roll. Take your time, guarantee everything is securely reassembled, and your vacuum will be working smoothly again, saving you both time and money.
What Are the Signs of a Misaligned or Damaged Brush Roll?
Your vacuum’s brush roll is the heart of cleaning—ignore misalignment symptoms or damage, and it’s like trying to sweep with a broken broom. Signs of a misaligned or damaged brush roll include uneven spinning, strange noises, and poor suction. If the brush roll is wobbling or missing bristles, it’s likely damaged. Spotting these issues early helps prevent costly repairs and keeps your vacuum performing at its best.
Is It Safe to Use My Vacuum Immediately After Realignment?
After realigning your vacuum brush roll, it’s safe to use it right away, but make sure you follow proper vacuum safety and maintenance tips. Double-check that the brush is securely in place and that no tools or debris remain inside. Running your vacuum for a few seconds to ensure everything sounds normal helps prevent damage. Regular maintenance, like checking the brush roll, keeps your vacuum running smoothly and prolongs its lifespan.
How Can I Prevent My Brush Roll From Becoming Crooked Again?
Think of your vacuum brush roll like a bicycle chain that needs regular oiling. To prevent it from crookedness, follow simple maintenance tips like checking for tangled hair and debris after each use. Store your vacuum properly using storage solutions that keep the brush aligned and protected. This way, you’ll minimize wear and keep the roll running smoothly, avoiding misalignment and ensuring your vacuum performs at its best.
Conclusion
Now that you’ve realigned your vacuum’s brush roll, your cleaner will run smoother than ever—like a race car on the track! Regularly checking and maintaining the brush roll keeps your vacuum performing at its absolute best, saving you time, effort, and frustration. With just a little bit of care, you can prevent future mishaps and keep your floors spotless. Say goodbye to stubborn clogs and crooked rollers—your home will thank you for your quick, expert fix!