

To teach teens proper vacuum maintenance in one lesson, focus on showing them how to inspect and clean filters, brushes, and cords regularly, emphasizing safety first by unplugging before handling parts. Explain the importance of understanding vacuum components, proper storage, and responsible usage to prolong their vacuum’s life. Demonstrate how to empty bags or bins correctly and check for blockages. Keep it simple, practical, and engaging—there’s plenty more to discover as you continue exploring this essential skill.
Key Takeaways
- Emphasize the importance of regular vacuum checks, cleaning filters, brushes, and emptying bins to maintain performance and prolong lifespan.
- Teach teens how to safely handle and remove vacuum components, unplug devices before maintenance, and store cords properly.
- Show the basic parts of a vacuum and how to identify issues like clogs, worn belts, or filter problems.
- Highlight safety precautions, including wearing protective gear and working in dry, well-lit areas during maintenance.
- Encourage responsible usage and routine maintenance to prevent costly repairs and ensure effective cleaning.
Understanding the Importance of Vacuum Maintenance

Have you ever wondered why your vacuum doesn’t work as well over time? Proper vacuum maintenance is essential to keep it running smoothly and efficiently. When you neglect regular upkeep, dirt and debris can clog the filters and brushes, reducing suction power. Understanding the importance of vacuum maintenance helps you avoid costly repairs and prolongs your machine’s lifespan. Always refer to the user manual for specific instructions on cleaning and care routines. Proper vacuum storage also plays a key role, protecting your appliance from damage when not in use. By staying on top of maintenance tasks like emptying the bin and checking the filters, you ensure your vacuum performs at its best, making your cleaning easier and more effective. Regularly inspecting and replacing filters can significantly improve suction power and extend the life of your vacuum.
Gathering Necessary Tools and Supplies
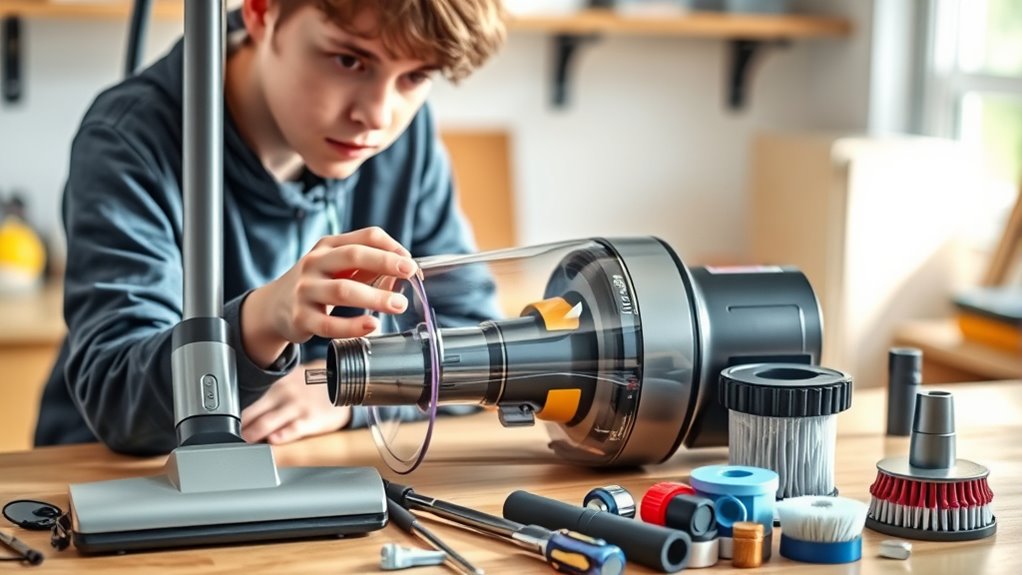
To keep the vacuum running smoothly, you need to gather the right tools and supplies. Make sure you have essential cleaning items like brushes and filters, along with any replacement parts your vacuum might need. Having these ready will make maintenance quick and effective. Additionally, understanding how smart home technology can monitor and optimize your cleaning routines can further streamline maintenance tasks. Smart home automation can offer real-time alerts for filter replacements and other upkeep needs.
Subheading 1: Essential Cleaning Items
Before starting vacuum maintenance, gathering all the necessary cleaning tools and supplies is essential. Understanding the vacuum’s tech innovations and its history helps you recognize what’s vital. You’ll need basic items like a screwdriver, a soft brush, a microfiber cloth, and a small vacuum hose attachment. These tools allow you to clean filters, remove debris, and access internal parts. Knowing the vacuum’s history reveals how designs have evolved, making it easier to identify compatible replacement parts later. Modern vacuums incorporate advanced features like HEPA filters and adjustable brushes, so having the right supplies guarantees proper care. Collecting these items beforehand streamlines the process, saving time and preventing frustration. Properly equipped, you’re ready to maintain the vacuum efficiently and extend its lifespan. Incorporating sound maintenance techniques can also help ensure the vacuum functions optimally over time.
Subheading 2: Replacement Parts Needed
When gathering replacement parts for your vacuum, it’s important to identify what components are most likely to need swapping over time. Common parts include filters, belts, and brushes. Check your vacuum’s manual for specific items that wear out or require regular replacement. Proper vacuum storage helps keep these parts in good condition and prevents damage. Additionally, verify that new parts are compatible with your model by confirming accessory compatibility. This prevents issues like fitting problems or reduced performance. Having spare filters and belts on hand means you’re prepared for routine maintenance or unexpected issues. Keeping these essential replacement parts organized and easily accessible makes vacuum care efficient, helping your teen develop good maintenance habits and extend the life of your vacuum.
Explaining the Basic Parts of a Vacuum Cleaner
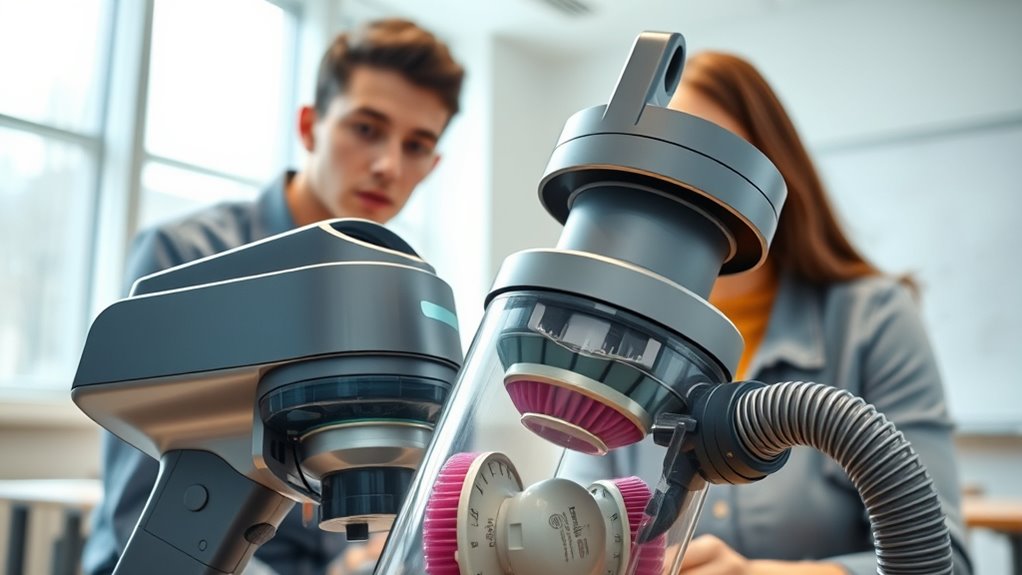
Understanding the basic parts of a vacuum cleaner helps you keep it running smoothly and extend its lifespan. The main components include the motor, which powers the vacuum, and the suction hose, which pulls in debris. The brush roll or beater bar agitates carpets to loosen dirt. You’ll also notice the vacuum noise—louder sounds often indicate a problem or clogged filter. The cord length is important for reach; a longer cord means less need to switch outlets. The power switch controls the device, while the bag or bin collects dirt. Knowing these parts helps you identify issues early. Regularly inspecting the hose and brush roll guarantees peak performance. Proper filtration systems are essential for allergen control, especially if you or your family members have sensitivities. Mastering these basics makes vacuum maintenance easier and safer for your machine.
Demonstrating How to Empty and Replace the Bag or Bin
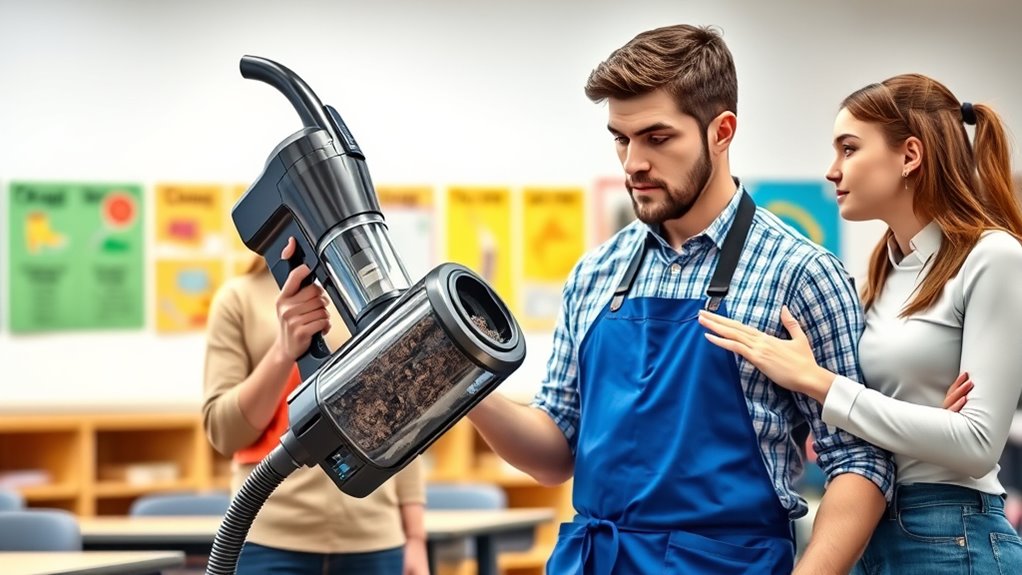
Start by showing your teen where the vacuum bin is located and how to access it safely. Guide them through removing the bin or bag carefully, making sure to avoid spills or dust clouds. Then, demonstrate how to replace and secure the bag or bin correctly to guarantee the vacuum works efficiently. Additionally, explain the importance of maintaining proper filter performance to ensure optimal image quality and suction power.
Locating the Vacuum Bin
To properly empty and replace the vacuum bag or bin, you first need to locate it. Usually, it’s behind a latch or panel on the vacuum body. Open the compartment carefully, avoiding dirt or debris falling out. Once open, identify the vacuum bag disposal area or bin; it’s often marked or shaped for easy access. Before proceeding, unplug the vacuum and use proper cord winding techniques to keep the cord tangle-free. This prevents damage and makes handling easier. Check if the bag or bin needs emptying, and ensure you have a new vacuum bag or replacement bin ready. Knowing exactly where the bag or bin is helps you avoid unnecessary mess and guarantees you perform maintenance efficiently and safely. Additionally, understanding the effectiveness of maintenance efforts can help ensure your vacuum remains in good condition over time.
Properly Removing Components
Once you’ve located the vacuum bag or bin, it’s time to carefully remove it. To do this, turn off the vacuum and unplug it for safety. Gently release any latches or clips holding the container in place. Be mindful of the vacuum’s suction power—don’t yank too hard. While removing, check that the cord is neatly stored to prevent tripping. Use the table below as a quick guide:
| Step | Tip |
|---|---|
| Turn off and unplug | Always disconnect before handling components |
| Release latches/clips | Handle with care to avoid damage |
| Remove the bin/bag | Do it slowly to avoid releasing dust suddenly |
| Check for blockages | Clear debris that might clog suction |
| Store cord properly | Prevent tangles when reassembling |
Following these steps ensures safe removal and prepares you for the next step—emptying and replacing.
Replacing and Securing Bag
When it’s time to replace or empty the vacuum bag or bin, you should do so promptly to maintain peak suction and cleaning performance. First, open the vacuum’s vacuum storage compartment carefully. If the bag is full, gently remove it, making sure not to rip or tear it. Securely replace the new bag or empty the bin, ensuring it clicks into place properly. This keeps airflow unobstructed and prevents dust from escaping. During this process, check the cord replacement if the cord shows signs of damage or wear—replacing it ensures safety and maximum operation. Properly securing the bag and maintaining the cord’s integrity are key to keeping your vacuum functioning efficiently. Regularly checking these components prolongs your vacuum’s lifespan and guarantees thorough cleaning each time. Additionally, understanding the family background of your vacuum brand can provide insights into its design and durability.
Showing How to Check and Clean Filters and Brushes

Ever wonder if your vacuum is working at its best? Checking and cleaning filters and brushes is essential. Start by identifying the vacuum filter types, such as HEPA or foam filters. Remove the filter and tap out dirt or wash it if it’s washable. Be sure it’s completely dry before reinstalling. For brush roller maintenance, turn off the vacuum and flip it over. Check for tangled hair, string, or debris wrapped around the brush. Use scissors or your fingers to clear out clogs. Regularly inspecting these parts keeps suction strong and cleaning effective. Remember, a clean filter improves airflow, and a well-maintained brush roller ensures efficient dirt pickup. Incorporating proper cleaning techniques into your routine can help maintain optimal performance. Doing this regularly helps your vacuum perform like new and extends its lifespan.
Teaching Proper Cord and Cable Management

Keeping your vacuum’s cords and cables tidy prevents tripping hazards and keeps your device in top shape. Proper cord organization is essential for safety and efficiency. When storing or using the vacuum, ensure cords are neatly wound and not tangled. This reduces wear and tear and prevents damage. To maintain cable safety, avoid pulling or yanking cords, which can cause fraying or breakage. Always unplug the vacuum by the plug, not the cord, to prevent damage. Additionally, check cords regularly for signs of wear. Here are some tips:
- Use cord wraps or clips to keep cables organized.
- Avoid running cords across walkways.
- Unplug cords carefully, avoiding sharp pulls.
- Store the vacuum in a way that prevents cable tangling.
Discussing Safety Precautions During Maintenance
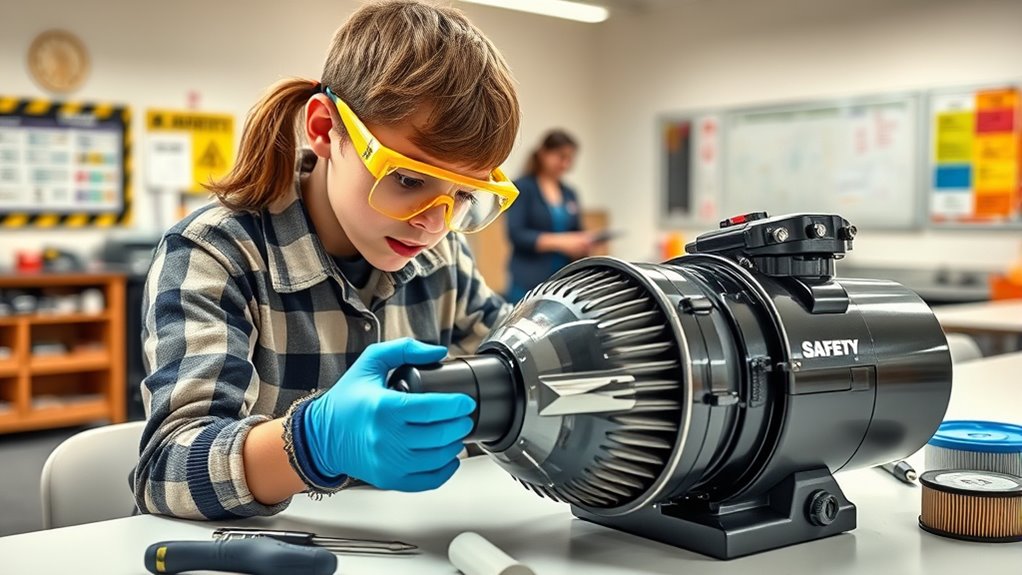
Before starting maintenance on your vacuum, it’s essential to take safety precautions to prevent accidents or damage. First, unplug the vacuum to guarantee electrical safety and avoid shocks. Never work on the motor or electrical components while the device is plugged in. Wearing personal protective equipment, like gloves and safety glasses, protects you from dust, debris, or sharp parts. Keep your workspace dry and well-lit to prevent slips or mistakes. Be cautious around moving parts, such as brushes or belts, and avoid forcing components apart. Always follow the manufacturer’s safety instructions. Taking these simple precautions ensures your maintenance is safe, effective, and damage-free, keeping both you and your vacuum protected. Incorporating lifestyle considerations, like organizing your workspace and ensuring adequate lighting, can further enhance safety during maintenance.
Encouraging Routine Checks and Responsible Usage

Regularly performing routine checks on your vacuum helps guarantee it operates efficiently and lasts longer. Many vacuum myths suggest neglecting maintenance is okay, but sticking to a cleaning schedule prevents problems. To promote responsible usage, consider these tips:
- Inspect and empty the dustbin or replace bags regularly.
- Check brushes and belts for wear and clean or replace as needed.
- Clear blockages in hoses and filters to maintain suction.
- Test for unusual noises or loss of power, addressing issues promptly.
Encouraging teens to follow these steps builds good habits and ensures the vacuum’s longevity. Responsible usage not only keeps the vacuum functioning properly but also avoids costly repairs. Reinforcing a consistent cleaning schedule makes maintenance easier and reduces the likelihood of vacuum myths.
Frequently Asked Questions
How Often Should Vacuum Filters Be Replaced or Cleaned?
You should check your vacuum filter regularly to determine if it needs substitution or cleaning. Generally, a good cleaning schedule involves cleaning or replacing filters every 1 to 3 months, depending on usage. If you notice reduced suction or a strange smell, it’s time for vacuum filter replacement or a thorough cleaning. Keeping up with this schedule ensures your vacuum works efficiently and prolongs its lifespan.
What Are Signs Indicating a Vacuum Needs Professional Repair?
Your vacuum whispers warnings when its airflow drops or the brush roller struggles to spin, signaling it’s time for professional help. If your vacuum sounds strained or leaves debris behind despite your efforts, it’s like a ship taking on water. These signs indicate internal issues, perhaps with the motor or belt, that need expert repair. Trust your vacuum’s language—addressing these cues keeps your cleaning vessel sailing smoothly.
Can Vacuum Maintenance Be Safely Performed Without Professional Tools?
You can perform basic vacuum maintenance safely without professional tools if you focus on DIY safety. Regularly empty the dustbin, check for blockages, and clean filters with household items. However, for more complex tasks like motor repairs or belt replacements, tool necessity becomes essential. Always unplug the vacuum before working on it, and avoid attempting repairs beyond your skill level to prevent injury or damage.
How Do Different Types of Vacuum Cleaners Require Specific Maintenance Steps?
Ever wondered why different vacuum cleaners need unique care? You should know that bagless models often require brush roller cleaning, while bagged vacuums need dust bag replacement. For upright vacuums, check and clean the brush roller regularly, but for canister types, focus on filter maintenance. By understanding these specific steps, you keep your vacuum running smoothly—saving time and money. Isn’t it worth mastering the right maintenance for your cleaner?
What Are Common Mistakes to Avoid During Vacuum Maintenance?
When maintaining a vacuum, avoid common mistakes like ignoring dust buildup, which can reduce suction. Always check for blockages and clean filters regularly. Also, prioritize cord safety; don’t yank or pull the cord harshly, as it can damage the cord or plug. By staying attentive to these details, you guarantee your vacuum stays effective and safe to use, preventing costly repairs and prolonging its lifespan.
Conclusion
By mastering vacuum maintenance, you’re becoming the guardian of your home’s cleanliness, wielding a tool that breathes new life into every carpet and corner. Think of your vacuum as a trusty steed—regular care keeps it galloping smoothly through chores. With each routine check, you’re planting seeds of responsibility that grow into a garden of tidy, safe spaces. Keep up the good work, and let your vacuum’s performance shine brighter than ever before.