Building your own hovercraft can be a thrilling DIY project! Start with a lightweight body and a reliable propulsion system, like fans, to generate lift. Make sure to create a well-sealed air cushion skirt using flexible materials to trap air efficiently. Safety is key, so use protective gear during construction. Once you’ve built your hovercraft, test it in a safe area and fine-tune for stability. Continue exploring for more tips and tricks to enhance your hovercraft experience!
Key Takeaways
- Select lightweight materials like plywood or plastic for a manageable hovercraft design.
- Ensure your air cushion skirt is well-sealed to effectively trap air for hovering.
- Position fans strategically to enhance lift, stability, and maneuverability during operation.
- Conduct tests in safe areas, making adjustments based on performance observations for optimal results.
- Prioritize safety by wearing protective gear and following guidelines when using tools and electrical components.

Building your own hovercraft can be an exciting and rewarding project that combines creativity with engineering. It’s a unique way to explore the principles of physics while having fun. Whether you’re a seasoned DIY enthusiast or a beginner looking for a challenge, constructing a hovercraft lets you explore the world of propulsion systems and design. Before you get started, you’ll want to familiarize yourself with the essential components and take the necessary safety precautions.
Building a hovercraft is a fun, creative project that merges engineering with physics exploration for all skill levels.
When you think about propulsion systems for your hovercraft, consider using a simple fan or a more complex setup involving multiple motors. Fans are generally easier to work with and can provide sufficient lift for a basic hovercraft. Make sure you choose a fan that can generate enough airflow to create a cushion of air underneath your craft. You’ll also want to understand how the angle and position of your fan affect the lift and maneuverability. Experimenting with different configurations can help you find the best setup for your design.
As you gather materials, think about using lightweight materials like plywood, plastic, or even cardboard for the body of your hovercraft. These materials can keep your craft light while ensuring it remains sturdy. You’ll also need a flexible skirt that can trap air underneath. This can be made from materials like fabric or plastic sheeting, which will create the air cushion necessary for hovering. Remember, the skirt’s design is vital; it should be sealed well to prevent air from escaping.
While building your hovercraft, safety shouldn’t take a back seat. Make sure to wear protective eyewear and gloves, especially when cutting materials or working with tools. If you’re using power tools, ensure you follow all safety guidelines and keep your workspace clean to avoid hazards. If your hovercraft uses electrical components or batteries, be aware of potential risks, such as short circuits or overheating. Always double-check your connections and ensure everything is properly insulated to prevent accidents.
Once you’ve assembled your hovercraft, it’s time for testing. Start in a safe, open area free from obstacles. This allows you to assess how well your propulsion system works and make necessary adjustments. Keep safety precautions in mind during testing, as hovercraft can move unpredictably. With patience and practice, you’ll improve your design and enjoy the thrill of gliding over surfaces. Enjoy the journey of building and experimenting, and embrace the satisfaction of creating something uniquely yours! Additionally, consider incorporating safety precautions to ensure a safe and enjoyable experience while building your hovercraft.
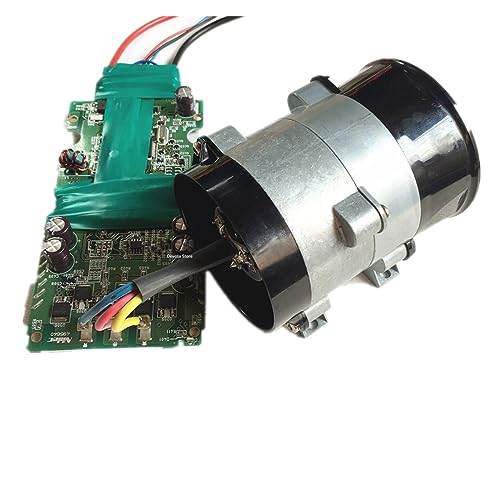
Metal Ducted Fan Inner Rotor Brushless DC Motor 380W 7.4V-16.8V High Speed Turbo Fan Induced Fan Wind Force Hovercraft(200W 20000RPM,X Speed Regulation)
Motors
As an affiliate, we earn on qualifying purchases.
As an affiliate, we earn on qualifying purchases.
Frequently Asked Questions
What Safety Gear Do I Need While Building a Hovercraft?
When you’re building a hovercraft, you need to wear protective clothing to shield yourself from potential hazards. Safety glasses are essential too, as they protect your eyes from debris and dust. Don’t forget gloves to keep your hands safe from sharp objects and rough materials. Steel-toed boots can also provide extra foot protection while you’re working. Ensuring you have the right safety gear will help you stay safe throughout the project.
How Much Does It Cost to Build a Hovercraft?
Building your own hovercraft can range from a few hundred to several thousand dollars, depending on your design and materials. Think of it as crafting your own chariot, where cost estimation plays a crucial role. You’ll need to account for material expenses like plywood, fans, and cushioning. A basic setup might cost around $500, while more advanced options could soar above $2,000. Planning and budgeting will ensure your hovercraft dreams take flight without breaking the bank.
Can I Use Recycled Materials for My Hovercraft?
Yes, you can definitely use recycled materials for your hovercraft! It’s a great way to promote eco-friendly building while saving money. Think about using old plastic, wood, or even repurposed fabric for the skirt. Just make sure the materials are sturdy and can withstand the hovercraft’s demands. By choosing recycled options, you’re not only cutting costs but also helping the environment, which makes your project even more rewarding.
What Is the Maximum Weight Limit for My Hovercraft?
Your hovercraft‘s weight capacity isn’t just a number; it’s the difference between gliding smoothly and crashing down like a ton of bricks! Generally, the load limit for a DIY hovercraft hovers around 200-400 pounds, depending on your design and materials. If you push it beyond this limit, you risk losing stability and control, turning your exciting ride into a bumpy disappointment. Stick to the guidelines, and you’ll soar through the air with ease!
How Long Does It Take to Build a Hovercraft?
It typically takes you anywhere from a few days to a couple of weeks to build a hovercraft, depending on your experience and the complexity of the design. Timing considerations like sourcing materials and your available working hours can impact the assembly timeline. If you’re organized and have all your parts ready, you might finish faster. Just be sure to take your time to ensure everything’s done correctly for peak performance.

Balsa Wood Sheet, 5 Pack Plywood Sheets, Basswood Sheets 12X12X1/16 Inch, Unfinished Wood Boards Blanks for Laser Cutting, Engraving, Burning, Crafts
Plywood Sheet Package: You will receive 5 pieces unfinished plywood sheets, measuring 12" x 12" with a thickness…
As an affiliate, we earn on qualifying purchases.
As an affiliate, we earn on qualifying purchases.
Conclusion
In conclusion, constructing your own hovercraft can be an exhilarating and rewarding experience. You’ll not only gain hands-on skills but also a deeper understanding of physics and engineering principles. So, why not take the plunge and set out on this exciting DIY adventure? With careful planning and creativity, you’ll be gliding over surfaces in no time. Remember, every great inventor started with a simple idea—yours could be the next breakthrough in personal transport!

Tong Gu 3D Air Mesh Fabric Net Cloth Three Layer Sandwich Spacer 3mm Thick Craft Seat Sew Material (Blue)
Material: polyester, chemical fiber.
As an affiliate, we earn on qualifying purchases.
As an affiliate, we earn on qualifying purchases.
Metal Ducted Fan Inner Rotor Brushless DC Motor 380W 7.4V-16.8V High Speed Turbo Fan Induced Fan Wind Force Hovercraft(200W 20000RPM,X Speed Regulation)
Motors
As an affiliate, we earn on qualifying purchases.
As an affiliate, we earn on qualifying purchases.