To perform DIY auto-pilot calibration in under an hour, start by parking your vehicle on a level surface in good lighting. Check and realign each sensor, like cameras and radar, using adjustable mounts if needed. Update your vehicle’s software to the latest version for improved calibration routines. Follow prompts to initiate calibration mode, which often involves specific driving patterns. For more tips on ensuring your system works smoothly, keep exploring the detailed steps below.
Key Takeaways
- Park vehicle in a well-lit, level area to facilitate accurate sensor inspection and adjustment.
- Check and realign sensors using adjustable mounts, ensuring they are straight and debris-free.
- Update vehicle software via infotainment or auto-pilot settings to access latest calibration algorithms.
- Initiate calibration mode and follow on-screen instructions, often involving specific driving patterns.
- Perform quick rechecks of sensor alignment and software updates if calibration issues persist.
Have you ever wondered how to guarantee your auto-pilot system operates smoothly and accurately? Ensuring your system functions properly is essential for safety and performance, and the good news is, you can often do it yourself in under an hour. The key steps involve sensor alignment and timely software updates, which are the backbone of reliable auto-pilot operation.
First, focus on sensor alignment. Your auto-pilot relies heavily on sensors like cameras, radar, and lidar to interpret the environment. If these sensors aren’t correctly aligned, your system might misjudge distances or fail to detect obstacles, leading to unsafe situations. To check and adjust sensor alignment, park your vehicle in a well-lit, level area. Carefully inspect each sensor’s position, ensuring they’re mounted straight and free of debris. Most sensors have adjustable mounts; loosen the screws slightly to realign them, then tighten securely once aligned. This simple step can drastically improve sensor accuracy. Remember, even slight misalignments can cause your auto-pilot to behave erratically, so take your time to get it right.
Proper sensor alignment is crucial for reliable auto-pilot performance; inspect and adjust mounted sensors in a well-lit, level area.
Next, verify your system is running the latest software updates. Manufacturers regularly release updates that fix bugs, enhance performance, and improve sensor calibration algorithms. Check your vehicle’s infotainment or auto-pilot settings menu for software update options. If an update is available, follow the prompts to download and install it. Installing the latest software is vital because it often includes refined calibration routines that can recalibrate sensors automatically, saving you time and effort. Keeping your software up-to-date also helps prevent compatibility issues with new road features and sensor components.
Once you’ve aligned your sensors and updated your software, run a quick calibration test. Many systems allow you to initiate a calibration mode from the settings menu. Follow the on-screen instructions, which might include driving in specific patterns or in certain conditions. This process allows the system to fine-tune sensor readings based on real-world data. If the calibration completes successfully, your auto-pilot should operate more smoothly. If issues persist, revisit sensor alignment and software updates, as these are the most common causes of calibration problems.
Additionally, understanding the importance of contrast ratio in your vehicle’s sensors can help optimize auto-pilot performance, especially in varying lighting conditions.

GM Parts SK1221 Fuel Level Sensor Kit with Seal
Measures fuel level changes displayed on fuel gauge
As an affiliate, we earn on qualifying purchases.
As an affiliate, we earn on qualifying purchases.
Frequently Asked Questions
Can Auto-Pilot Calibration Be Performed on All Vehicle Models?
Auto-pilot calibration isn’t possible on all vehicle models because of differences in vehicle compatibility and software updates. Some cars require specific calibration procedures or software versions, so you might need to check your vehicle’s manual or consult the manufacturer. Always verify your car’s software is up-to-date before attempting calibration, as outdated software can affect accuracy or make calibration impossible. Compatibility and updates are key to successful auto-pilot calibration.
What Tools Are Necessary for DIY Auto-Pilot Calibration?
Imagine revealing a secret to smoother drives—calibration tools make it possible. For DIY auto-pilot calibration, you’ll need basic tools like a reliable calibration software and accessories for sensor alignment. These help fine-tune your vehicle’s sensors, ensuring the best performance. Most models are compatible, but double-check your car’s specifications. With the right tools, you can confidently calibrate your auto-pilot system and enjoy safer, more accurate driving experiences.
How Often Should Auto-Pilot Calibration Be Repeated?
You should repeat auto-pilot calibration whenever you notice issues with sensor alignment, such as inconsistent navigation or steering problems. Regularly updating your software also helps maintain ideal calibration, preventing drift over time. It’s a good idea to perform calibration after major software updates or if your vehicle experiences rough terrain or unusual driving conditions. Keeping up with these steps ensures your auto-pilot remains accurate, safe, and reliable.
Are There Risks Involved in DIY Auto-Pilot Calibration?
While attempting DIY auto-pilot calibration might seem straightforward, it’s wise to consider potential pitfalls. Improper sensor alignment or missing critical software updates can lead to subtle issues or decreased accuracy. Rushing through calibration might introduce small missteps, so you should follow instructions carefully. Taking your time ensures your auto-pilot functions smoothly, reducing the chance of unintended surprises and keeping your driving experience safe and reliable.
Does Auto-Pilot Calibration Affect Vehicle Warranty Coverage?
You might wonder if auto-pilot calibration impacts your vehicle warranty coverage. Generally, warranty implications depend on whether the calibration is performed correctly and if it’s considered a manufacturer-approved procedure. Coverage concerns arise if improper calibration causes damage or malfunctions, potentially voiding parts of your warranty. Always check your vehicle’s warranty terms and consult the manufacturer before attempting calibration to avoid any coverage issues.

303-1521 Crankshaft Position Sensor Alignment Tool Compatible with Ford 2.0L GTI 2.3L, Replace for OEM # 303-1521 303-1390A
APPLICATION: The 303-1521 crankshaft sensor alignment tool fit for Ford 2.0L & 2.3L GTI after 2010, also for…
As an affiliate, we earn on qualifying purchases.
As an affiliate, we earn on qualifying purchases.
Conclusion
In just under an hour, you can confidently calibrate your auto-pilot, saving both time and money. Did you know that proper calibration can improve your vehicle’s accuracy by up to 30%? That means safer, more efficient driving without relying on costly professional services. With these simple steps, you take control and guarantee your auto-pilot performs at its best—empowering you to hit the road confidently and safely every time.
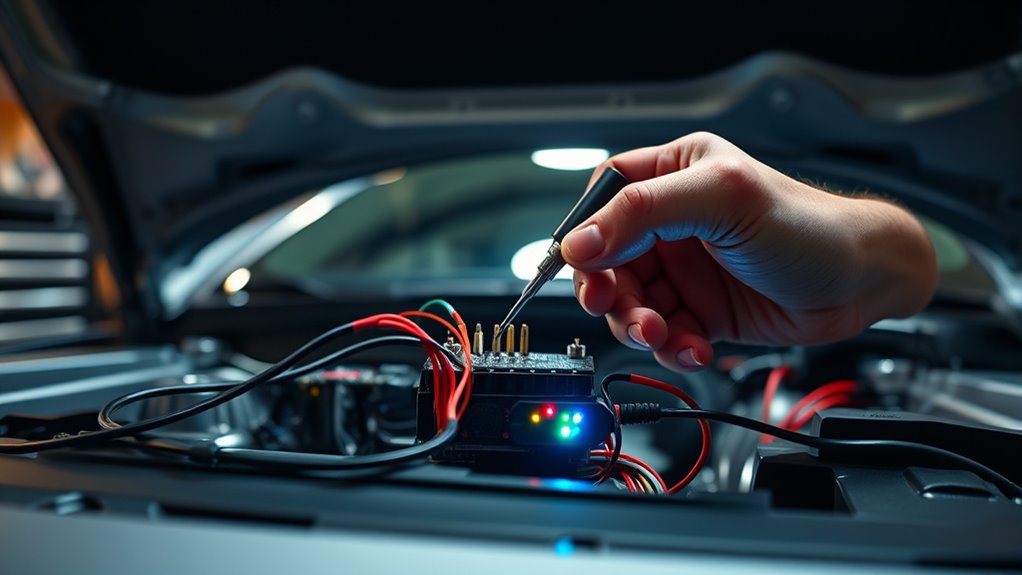
auto-pilot software update device
As an affiliate, we earn on qualifying purchases.
As an affiliate, we earn on qualifying purchases.

Relioky Valve Adjustment Tool for 10mm Jam Nut,with Angled Feeler Gauge, Slotted Valve Adjusting Stud,Valve Lash Adjustment Tool for Honda,Toyota,Nissan and Other Japanese Car Engines
【integrated design】: Instead of the hassle of using multiple tools, combine them into one to make valve clearance…
As an affiliate, we earn on qualifying purchases.
As an affiliate, we earn on qualifying purchases.