
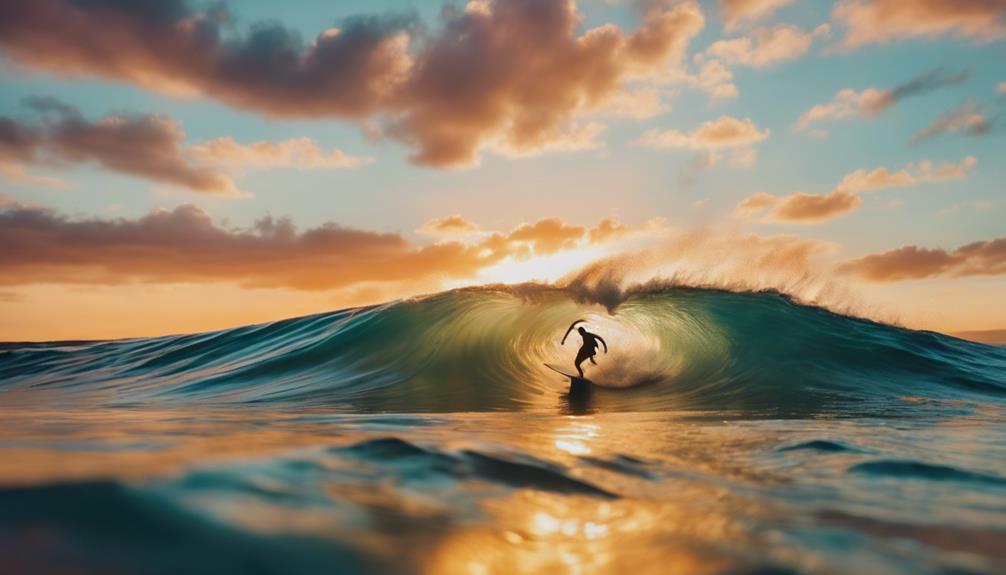
To draw a surfing wave, start by using a 6B graphite pencil for smooth detailing. Outline the wave using oval or teardrop shapes, capturing its movement. Depict the breaking point where foam forms at the peak, adding dark shading for depth. Incorporate lighter tones to simulate transparency and enhance vibrancy. Use swirling and vertical lines for foam movement and reflective effects. Don't forget to add texture with puffy, scalloped lines. Finally, experiment with shades to create contrast and develop your style. There's so much more to explore, including techniques that can truly bring your wave drawings to life.
Key Takeaways
- Start with oval or teardrop shapes to outline wave movement and structure, ensuring a dynamic representation.
- Use a 6B graphite pencil for shading, enhancing depth and contrast in the wave and foam areas.
- Incorporate puffy scalloped lines for realistic foam and swirling lines to illustrate movement and energy in the water.
- Apply acrylic paints to add color and texture, emphasizing the contrast between dark foam and lighter wave surfaces.

Faber-Castell Graphite Sketch Pencil Set – 6 Graphite Pencils (2H, HB, B, 2B, 4B, 6B), Drawing Pencils and Sketching Supplies
VERSATILE GRAPHITE PENCILS – Faber-Castell graphite pencils are a diverse and versatile tool for artists and beginners alike!…
As an affiliate, we earn on qualifying purchases.
As an affiliate, we earn on qualifying purchases.
Essential Materials for Drawing
To create stunning wave drawings, you'll need a few essential materials that enhance your artistic process and help capture the beauty of the ocean.
Start with a solid 6B graphite pencil. Its softness allows you to create smooth shifts and shading, particularly when focusing on the face of the wave. This pencil is perfect for detailing the wave's curves and the foamy edges.
A clipboard and printer paper are also vital for a stable drawing surface, especially when you're sketching outdoors. They offer portability and ease of use, allowing you to find the best position for capturing your subject.
When outlining the movement of a wave, begin with oval or teardrop shapes to represent the wave's peak and the bottom of the wave. This helps convey dynamic motion.
Once you've completed your initial sketch, consider incorporating acrylic paints to add color and depth to your artwork. These materials will enable you to create realistic textures and highlight the stunning colors of the ocean, enhancing your overall drawing experience.

Winsor & Newton Galeria Acrylic Paint, 10 x 60ml (2–oz) Tube Paint Set
PROFESSIONAL PIGMENTS, SMARTLY BALANCED: Bright, stable colours with high tinting strength, thanks to high-quality pigments at a lower…
As an affiliate, we earn on qualifying purchases.
As an affiliate, we earn on qualifying purchases.
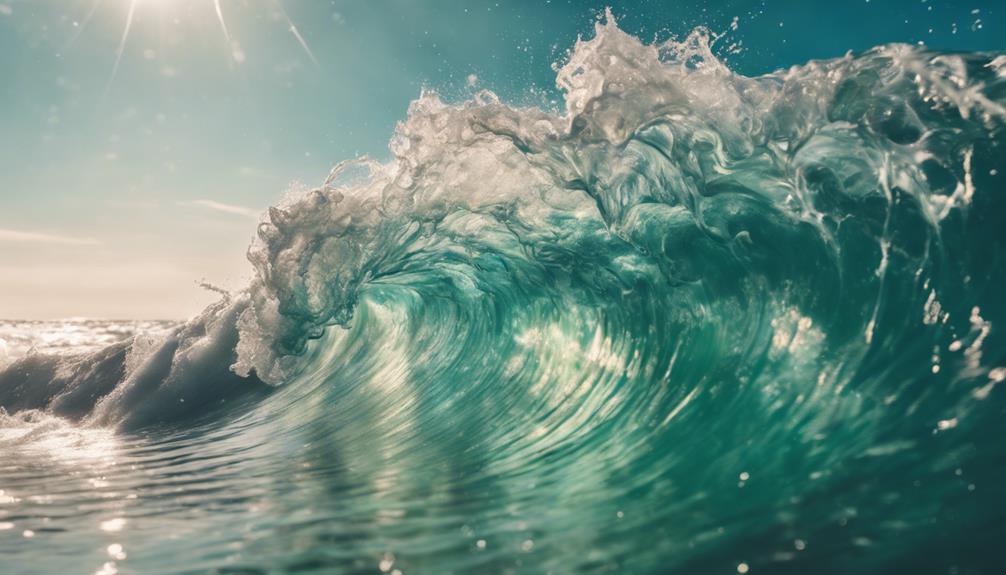
Understanding Wave Dynamics
Understanding how waves form and move is essential for accurately capturing their beauty in your drawings. Waves typically arise from wind energy transferring to water, creating a dynamic energy flow.
To visualize this, consider the following aspects of wave dynamics:
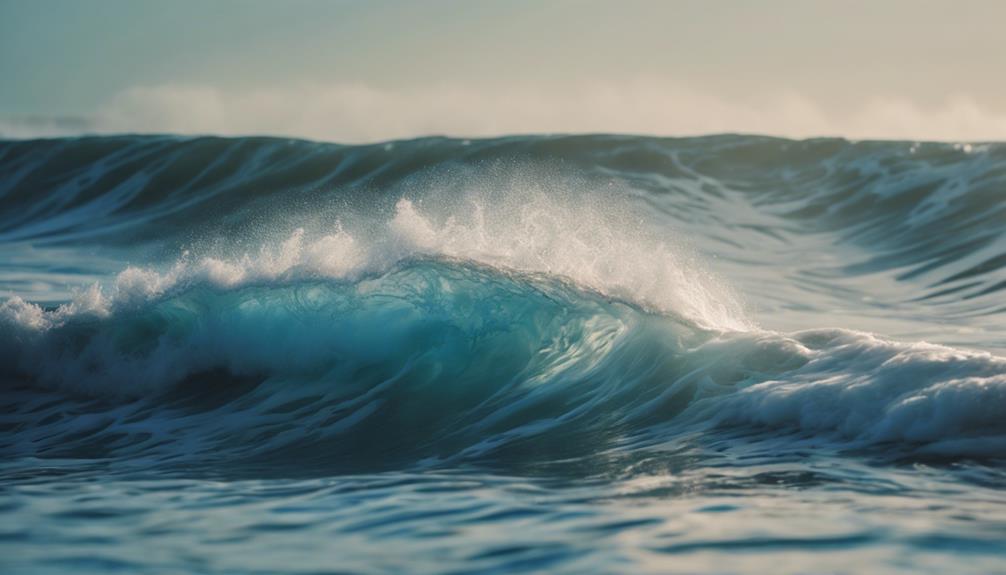
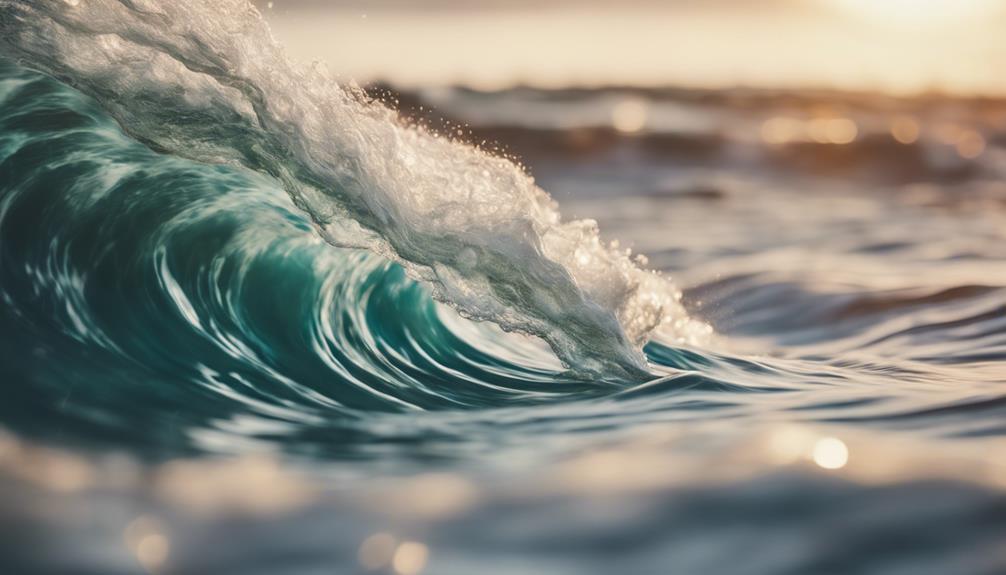
- Initial Shape: A wave starts as an oval or teardrop, indicating its movement and potential breaking point as it nears the shore.
- Barrel Formation: As the wave builds, it reaches its peak and tips sideways, transforming into a barrel shape, easily depicted with curved lines.
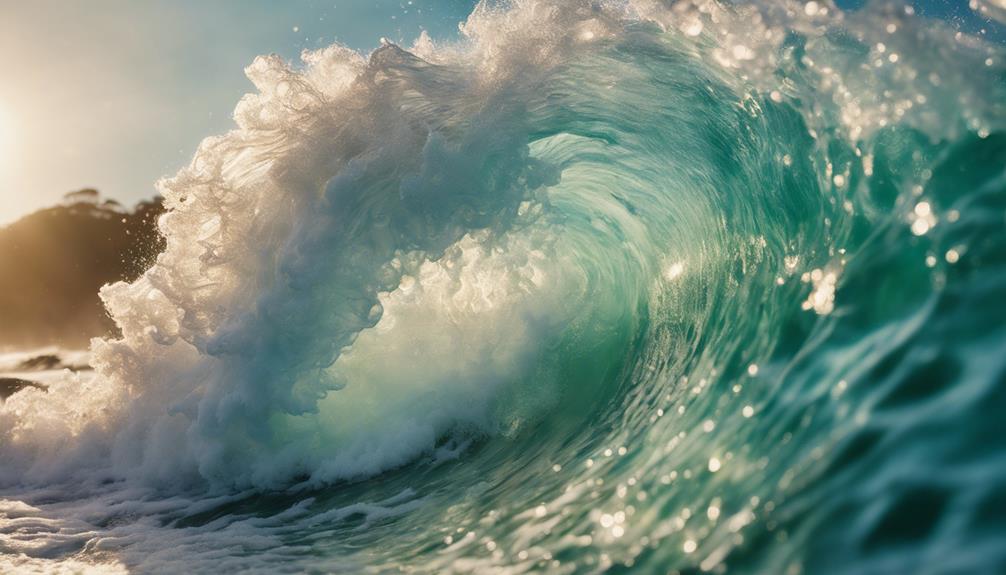
- Breaking Point: When a wave's energy exceeds its depth, it breaks, forming foam at the peak. This foam can be illustrated with puffy, scalloped lines.
- Water Dynamics: A wave that's rolling towards you creates a visual contrast between the dark foam and lighter water, adding depth to your drawing.
To truly represent a wave, make sure you grasp these dynamics and their visual implications. This understanding won't only enhance your artistic skills but also allow you to draw waves that feel alive and enchanting.
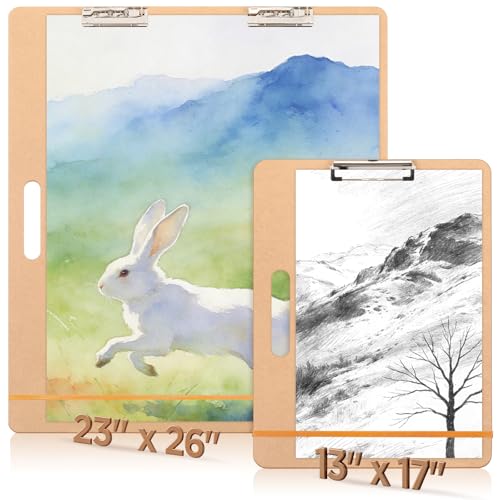
YooNotee 13"x17" & 23"x26" Sketch Board Set Artists Drawing Clipboards with Handle Drawing Tote Board for Sketching & Watercolor with Sturdy Clip and Elastic Bands Portable Art Clipboard for Painting
Packaging Includes: the set includes two drawing clipboards of different sizes, with dimensions of 13 x 17 inches/…
As an affiliate, we earn on qualifying purchases.
As an affiliate, we earn on qualifying purchases.
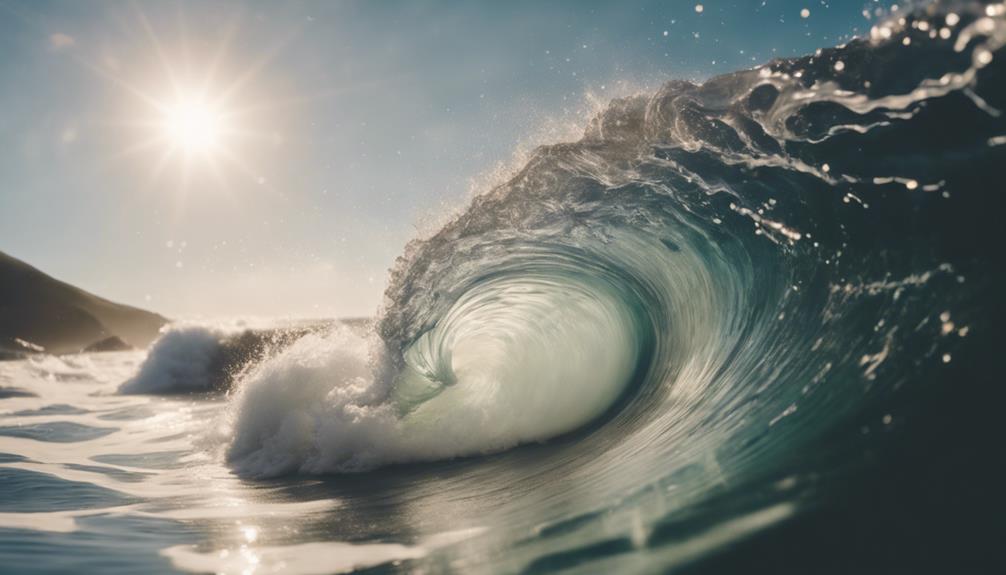
Techniques for Light and Shadow

When drawing a surfing wave, mastering light and shadow techniques can bring your artwork to life and enhance its dynamic qualities.
Start by utilizing dark shading techniques on the foam of the wave. This creates depth and contrast against the lighter wave body, emphasizing the energy and movement of the next wave. Apply directional shading that follows the wave's flow, enhancing the illusion of motion within your piece.
Incorporate lighter tones where light penetrates the wave to depict transparency, adding vibrancy to your composition. Use vertical lines in your shading to simulate reflective water effects, making your wave appear more realistic and engaging. These reflections can help capture the essence of the ocean in your artwork.
Don't shy away from experimenting with smudging techniques to achieve smoother shifts between light and dark areas. This method conveys the fluidity of the wave, making it feel alive and in motion.

N NOROCME 12 PCS Blending Stumps and Tortillions Paper Art Blenders with Sandpaper Pencil Sharpener Pointer for Student Artist Charcoal Sketch Drawing Tools
13 Pcs in Total: 6 pcs blending stumps(#1, #2, #3, #4, #5, #6); 6 pcs tortillions(#1, #2, #3),two…
As an affiliate, we earn on qualifying purchases.
As an affiliate, we earn on qualifying purchases.
Sketching the Wave Structure

Start your sketch by outlining the wave's initial shape as an oval or teardrop to effectively convey movement and energy. This foundational shape sets the stage for your drawing.
As you progress, focus on the dynamic aspects of the wave.
- Draw the wave peak tipping sideways, capturing the moment it begins to break, illustrating the raw power of the ocean.
- Use smooth, curved lines to depict the barrel of the wave, creating a sense of depth and inviting the viewer into its hollow form.
- Integrate puffy, scalloped lines at the peak to represent the foam, signaling the wave's energy and adding realism to your work.
- Don't forget to include additional waves in the background, which will enhance the overall composition and provide a sense of continuity that draws the eye across the scene.
Creating Foam and Texture
To bring your wave to life, focus on crafting realistic foam and texture that captures the ocean's dynamic movement. Start by using puffy, scalloped lines at the wave's peak to represent the water's breaking action. This technique gives your foam a natural appearance, crucial for realism.
Next, add dark shading to the foam areas; this will enhance depth and create a striking contrast against the lighter sections of the wave. The interplay between light and dark makes your artwork feel more dynamic.
Incorporate swirls within the foam to illustrate its movement, adding a sense of flow and energy. These swirling lines can also guide your viewer's eye, enhancing the wave's liveliness.
Utilize vertical lines and directional shading techniques that follow the wave's movement. This approach creates a reflective water effect that beautifully complements the foam.
Enhancing Depth With Contrast

Building on the foam and texture, enhancing depth with contrast is key to creating a more lifelike wave. By using darker shades for the foam against the lighter colors of the wave, you create a striking contrast that adds dimension.
Here are some techniques to reflect upon:
- Directional Shading: Follow the movement of the water with your shading to emphasize flow and realism.
- Vertical Lines: Incorporate vertical lines to simulate reflective water effects, further enhancing the wave's structure.
- Smudging Techniques: Use smudging to smooth shifts between light and dark areas, creating a dynamic appearance in your wave.
- Light Filtering: Capture the light filtering through the wave, contributing to a vibrant backdrop that accentuates the contrast with the surrounding water.
Artistic Techniques for Movement
Capturing the essence of movement in a surfing wave requires a combination of techniques that emphasize flow and energy.
Start by sketching the initial shape of the wave using an oval or teardrop form. This will effectively represent the movement and flow you're aiming for.
Next, utilize dark shading techniques to highlight the structure, focusing especially on the foam and barrel areas. This enhances the perception of depth and movement.
To further create a sense of motion, apply vertical lines that mimic reflective water effects. These lines will contribute to the dynamic appearance of your wave.
Incorporate directional shading that follows the natural flow of the water; this will help reinforce the energy contained within the wave.
Developing Your Unique Style
Finding your unique style in drawing surfing waves involves experimenting with various techniques and materials that resonate with your artistic vision. To truly develop your style, try incorporating these elements into your practice:
- Wave Structures: Start with the teardrop shape, gradually adding layers to capture the intricate foam and curl.
- Contrast Play: Use dark and light shades to create depth, making your waves pop off the page.
- Materials: Experiment with a 6B pencil for smudging effects or acrylic paints for vibrant colors and textures.
- Personal Touch: Add your signature or thematic inspirations, like ocean conservation or local surf culture, to make your work uniquely yours.
The key is continuous practice and exploration.
Don't shy away from mixing different techniques and materials until you find what feels right. Engage with the world around you; let the essence of the ocean and your personal experiences influence your art.
Over time, as you refine your approach, your unique style will emerge, setting your waves apart from others and reflecting your artistic journey.
Engaging With Your Audience

Engaging with your audience is all about building connections and making them feel part of your artistic journey.
By inviting feedback and sharing your challenges, you encourage viewers to interact and invest in your process.
Let's explore how fostering a sense of community can enhance both your art and your audience's experience.
Building Community Connections
Creating a thriving community around your art involves encouraging comments, interactions, and feedback that spark meaningful connections with your audience. When you actively engage with your viewers, you foster a sense of belonging and shared interest.
Here are four ways to strengthen those connections:
- Personal Touches: Incorporate your unique style or signature in your projects. This helps viewers feel a direct connection to you and your artistic journey.
- Video Tutorials: Share your process through engaging video content. This invites viewers to comment, like, and subscribe, creating a lively dialogue around your art.
- Shared Experiences: Open up about your artistic growth and challenges. When you share your story, it encourages followers to share their own experiences, fostering collaboration.
- Celebrate Creativity: Highlight the creativity within your community by showcasing followers' artwork. This not only validates their efforts but also inspires them to engage actively with your content.
Encouraging Viewer Interaction
Building on the connections you've fostered, encouraging viewer interaction can greatly enhance your artistic community. Start by inviting your audience to leave comments about their favorite techniques or questions they've about drawing waves. This not only fosters engagement but also creates a vibrant space for discussion.
You can further promote interaction by encouraging viewers to share their completed wave drawings on social media using a specific hashtag. This showcases their creativity and allows others to get inspired by different interpretations.
Additionally, consider incorporating polls or surveys in your content. Ask your audience what future art topics they want to explore. This involvement makes them feel valued and part of your creative journey.
Don't forget to prompt viewers to engage with your videos! Encouraging likes, subscriptions, and shares reinforces the importance of their support in building a thriving artistic community.
Lastly, hosting live Q&A sessions can create a direct connection with your audience. They can ask about techniques or share their experiences, making the interaction personal and meaningful. By fostering this engagement, you're not just teaching art; you're building a supportive network of passionate artists.
Sharing Artistic Journeys
Sharing your artistic journey not only connects you with your audience but also inspires them to commence on their own creative paths. When you share your experiences, you create a sense of community that can encourage others to explore their creativity.
Here are four ways to engage effectively with your audience:
- Personal Touches: Include your unique style or signature in your work. This personal element makes your art memorable and relatable.
- Insights and Experiences: Share the stories behind your creations. Discuss challenges you faced and how you overcame them, as this can inspire others to push through their own hurdles.
- Prompt Interaction: Encourage your viewers to engage by asking for feedback or thumbs up. This interaction fosters a loyal following that feels involved in your journey.
- Future Projects: Anticipate their responses and express excitement for what's next. Keeping your audience informed about upcoming works maintains their interest and strengthens your connection.
Finalizing Your Artwork
As you finalize your artwork, adding details like foam and additional waves can elevate the piece and bring it to life. Start by incorporating lighter shades for the background waves, creating depth that enhances your overall composition. This layering adds visual interest and makes the foreground waves pop.
Next, focus on the foam. Use puffy, scalloped lines on the wave faces to simulate the dynamic movement of breaking waves. This detail captures the essence of the ocean's energy and adds realism to your piece. For added contrast, employ dark shading techniques on the foam. This contrast emphasizes the structure and depth, making your waves appear even more dramatic.
Don't forget to sign your artwork with a personal touch, like 'Jim Free Heart.' This gives your piece a unique identity and connects with viewers on a personal level.
Finally, consider engaging your audience. Invite them to share their thoughts on your artwork and encourage interaction by asking them to like or subscribe. This not only builds your community but also enhances your artistic journey.
Happy finalizing!
Frequently Asked Questions
How Do You Draw a Wave Surfing?
To draw a surfing wave, start with a teardrop shape. Add a peaked curve, then sketch foam with scalloped lines. Shade for depth, and include background waves to create a lively scene. Enjoy the process!
How to Sketch a Big Wave?
To sketch a big wave, start with a broad, curved shape. Emphasize its peak and add dynamic lines for movement. Incorporate shading and texture to give depth, making the wave feel alive and powerful.
How Do I Draw a Wave?
To draw a wave, start with a teardrop shape. Use a soft pencil for smooth lines, emphasize the peak with scalloped edges, and add shading for depth. Capture movement with directional swirls for realism.
How to Draw Breaking Waves?
To draw breaking waves, start with an oval shape, tilt it for movement, and use scalloped lines for foam. Add dark shading to enhance depth and follow the water's direction for realism.
Can the Techniques for Drawing a Surfing Wave Be Applied to Creating a River Surfing Wave?
Yes, the techniques for drawing a surfing wave can definitely be applied to creating a river surfing wave. By understanding the physics of wave formation and the way different elements interact, you can learn to make river surfing wave that mimics the exhilarating experience of riding ocean waves.
Conclusion
In the end, drawing a surfing wave is like riding the crest of creativity.
You've gathered your materials, understood the dynamics, and mastered techniques that give life to your art.
As you develop your unique style, remember that each wave you create can inspire others.
So, embrace your artistic journey and engage with your audience, letting your passion flow like the ocean itself.
Now, grab your pencil and ride those artistic waves to new horizons!